the basics
Playing with light
There are three main ways of controlling the amount and quality of light that a sensor recieves. One being the aperture, another being the shutter speed and lastly we have the ISO. There’s a couple neat little analogies we can use to understand these three qualities.
Think about filling an ice cube tray under a tap with running water. In our analogy the running water serves the purpose of light, and the cubes in the tray represent the pixels on a sensor.
Aperture

The aperture determines exactly how much light is let in through the lens, in the case of our analogy, the aperture would be the diameter of the tap that supplies the water, the larger the diameter, the more the amount of water (light) that can enter the tray (sensor).
On a camera, the aperture is usually measured as a ratio between the focal length and the diameter of the opening in the lens, known as the f-number or f-stop. This approach is used as the size of the opening relative to the focal length is what determines the amount of light that is collected. For example, two lenses of different focal lengths but the same apertures will collect the same amount of light but at very different fields of view.
The focal length of a lens basically determines how wide of a field of view the camera can see, a lower focal length allows us to capture more of the surroundings in frame, and a higher focal length narrows down our field of view and puts the focus on a single object. Higher focal lengths are used generally for portraits, far away objects like the moon, etc.
Say a lens has a focal length of 50mm and the diameter of its opening is 25mm, then its f-number will be 50 divided by 25 which is equal to 2. We denote this by adding an f in front of the ratio: f2.0 or f/2.0. The smaller the f-number, the larger is the opening on the lens. It is a bit counterintuitive and there’s no real way of justifying why it is the way it is aside from just convention.
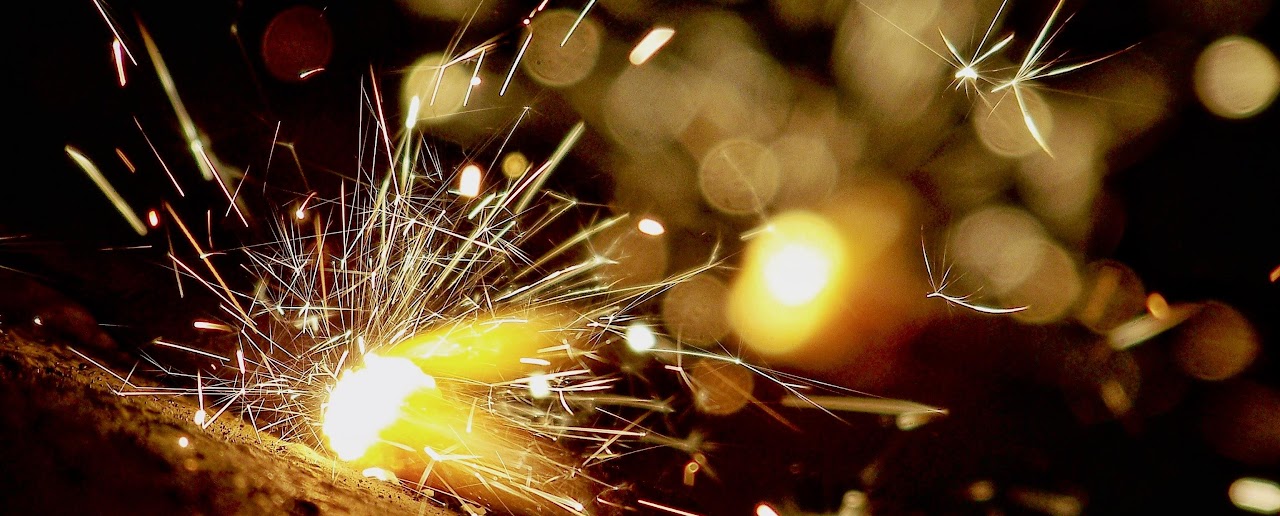
Ever wondered how or why some photos have a very blurred background with circular-looking blobs of light? Well, that has to do with something called depth of field or bokeh, which determines how much of the background is out of focus. Good quality bokeh is a favorite amongst photographers and videographers alike, it helps isolate the subject and allows cinematographers to pull the focus (pun intended) of the audience from one actor to another.
How to choose the correct aperture?
The choice of aperture comes down to the nature of what a photographer is trying to capture.
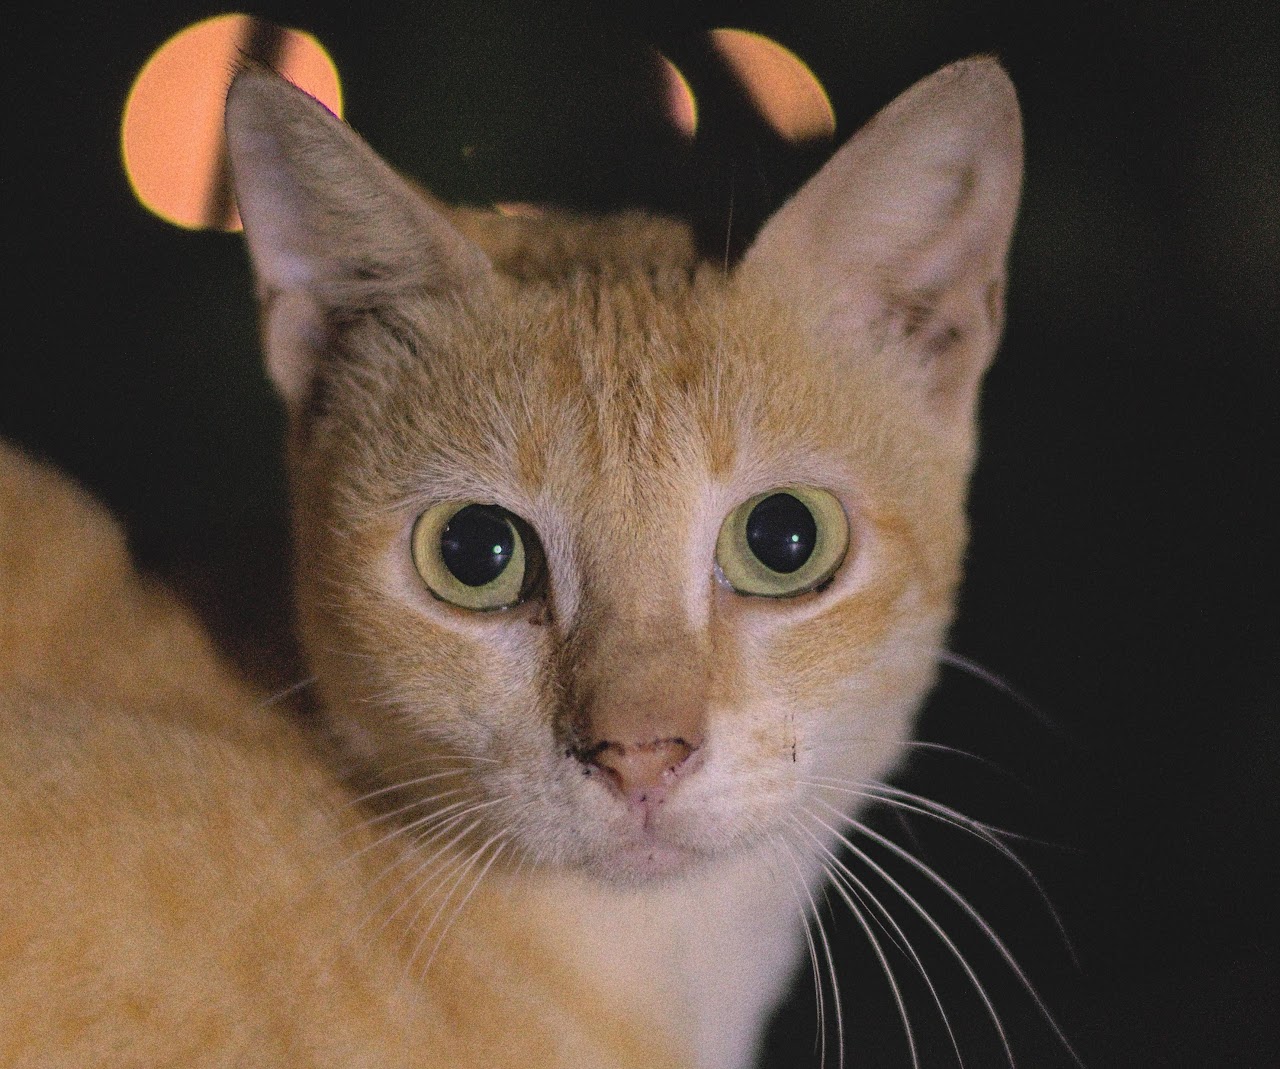
This picture of a cat, shot at f/1.8 and 50mm, shows how the cat is in focus but the lights in the background and the background itself are completely out of focus, helping the viewer to focus on the subject.
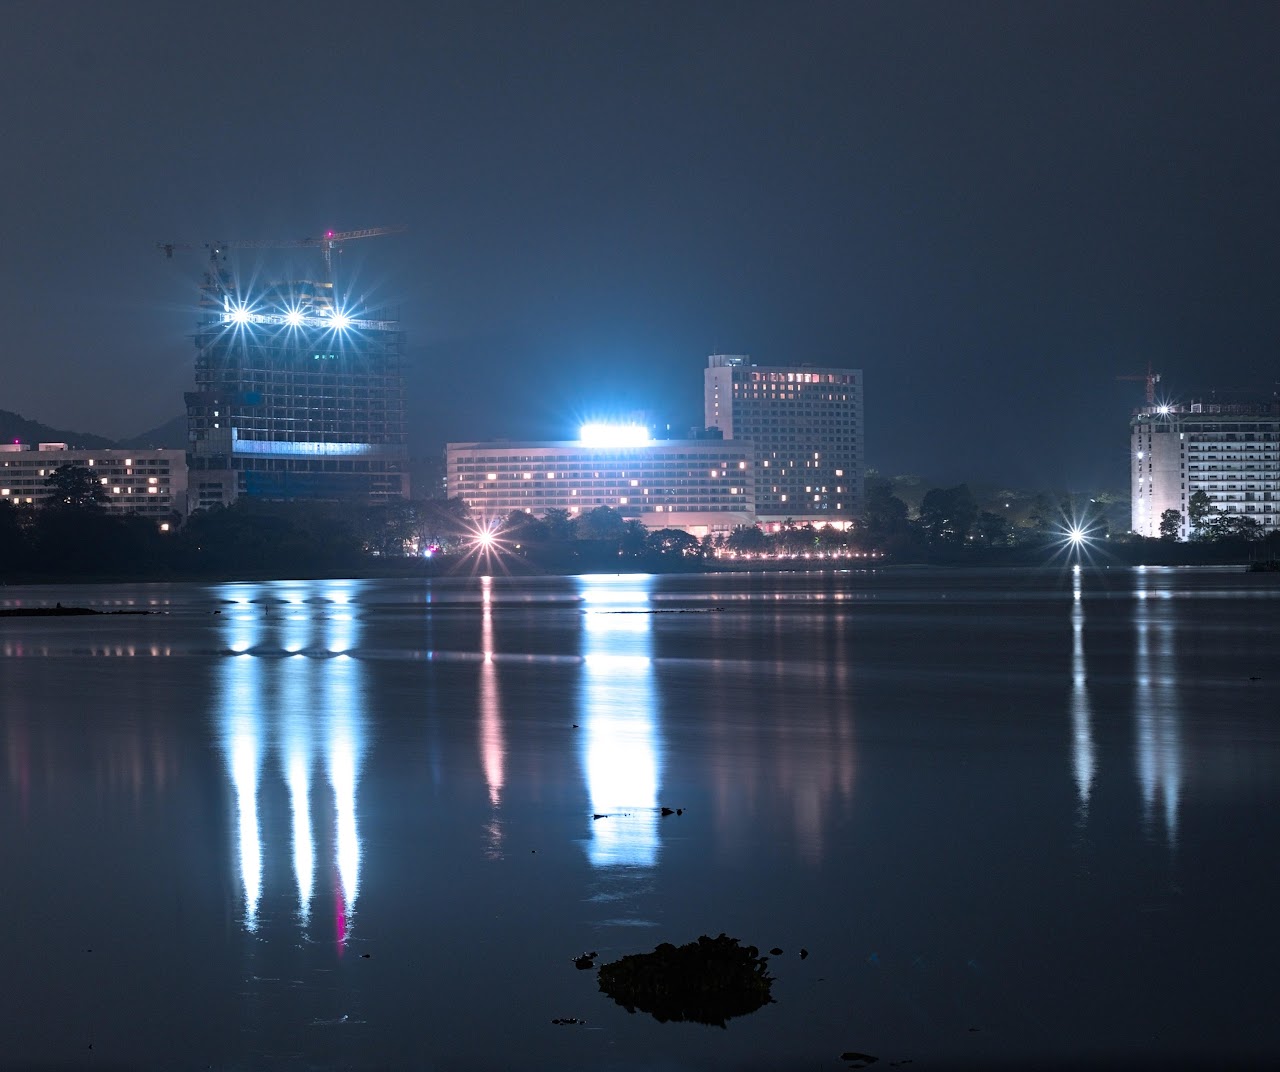
This picture of the Powai Lake, shot at f/11 and 50mm, shows how each part of the lake is in focus, helping the viewer to see the picture as a whole rather than to focus on a specific part.
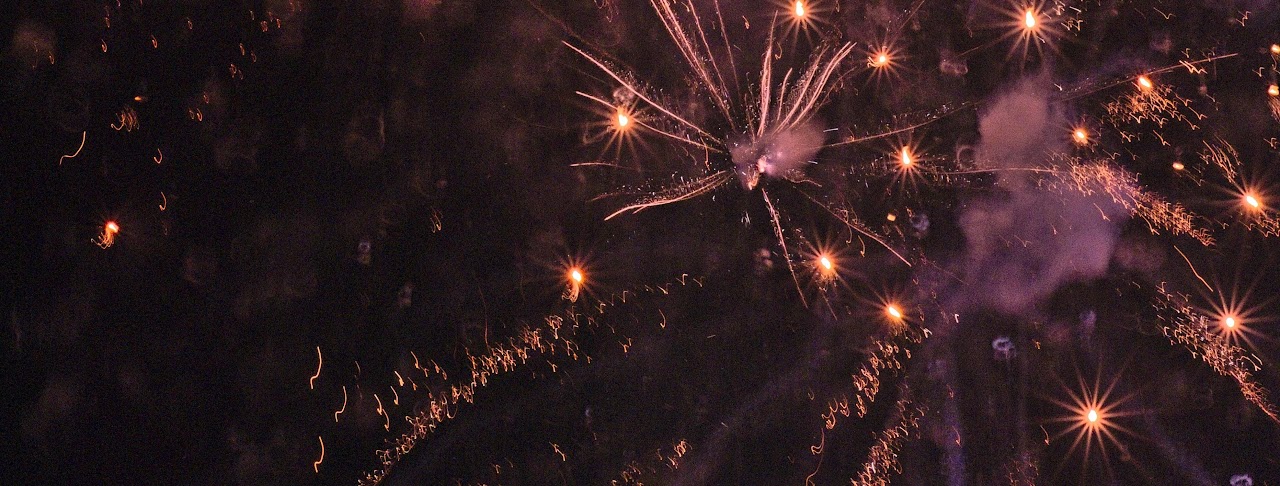
There’s another interesting artifact caused by the aperture of a lens which can be seen in the form of spikes on the point sources of light in this picture of a firework. This effect is also known as the starburst effect as it is most prominent while taking pictures of the sun. This shot was taken at f/16 which is a very small opening on the lens.
If we look at the picture of the lens at the beginning of the aperture subheading, we can see that the lens has seven “blades” forming a heptagon that open and close to change the size of the iris. Now looking again at the above image we can see that there are fourteen spikes in each point source, this specific number comes from the number of blades a lens has. A lens that has an even number of aperture blades produces the same number of spikes, whereas a lens with an odd number of blades produces double the number of spikes, that’s why we see fourteen spikes using a lens that has seven blades.
Shutter speed

Next, we have the shutter speed also known as exposure time of a camera tells us the duration for which the sensor is exposed to light, if we take the example of our analogy, then the shutter speed would be signified by how long the tap is running or a more accurate way of saying it would be the amount of time the tray is under the tap.
The usual way of measuring the shutter speed is in terms of fractions of a second (1/100s, 1/50s, 1/320s and so on). Choosing the right shutter speed is very important when it comes to the sharpness of an image. While photographing people or pets, the preferred shutter speed would be faster than 1/100s (here faster than would mean a numerically smaller value than 1/100) so as to minimise motion blur. With a slower shutter speed (longer exposure) theres more motion blur that can be introduced into an image, the motion blur can be from the subject or from the photographer’s hand itself.
How to choose the correct shutter speed?
The choice of shutter speed again depends on the look and feel the photographer wants their image to have.
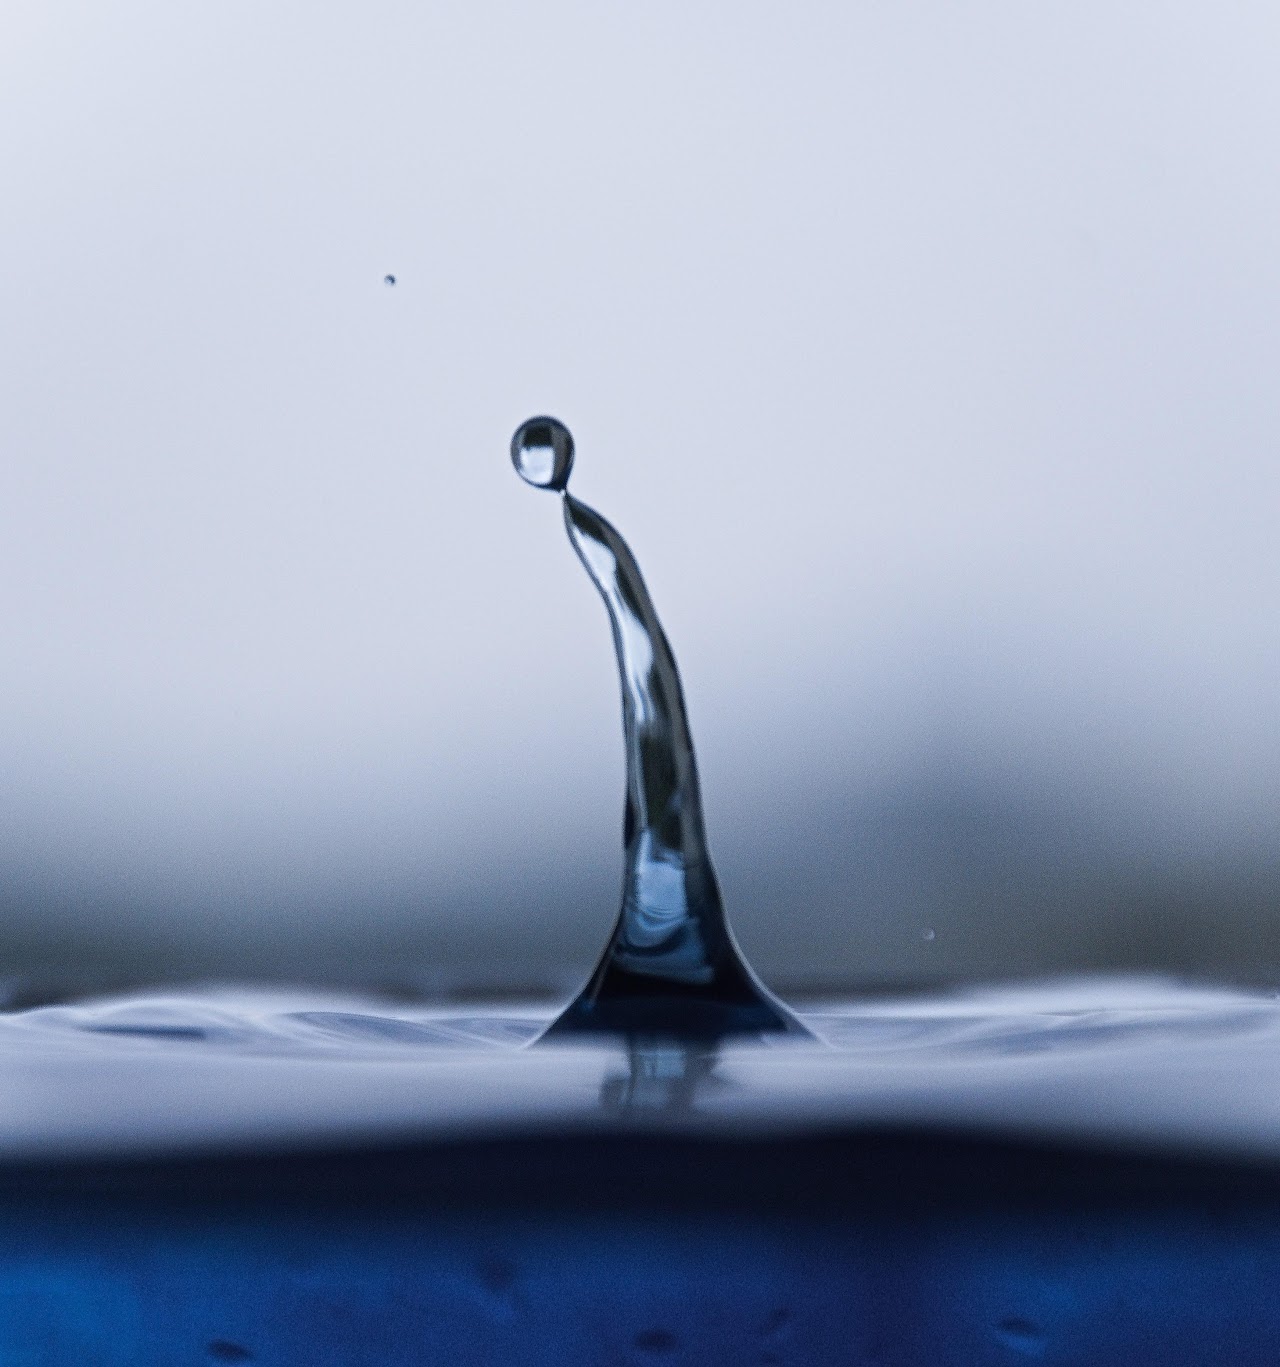
This picture of a waterdrop that fell in a tub of water for instance, was shot with an exposure of 1/5000s. Every part of the drop is tack sharp and no motion blur can be seen.
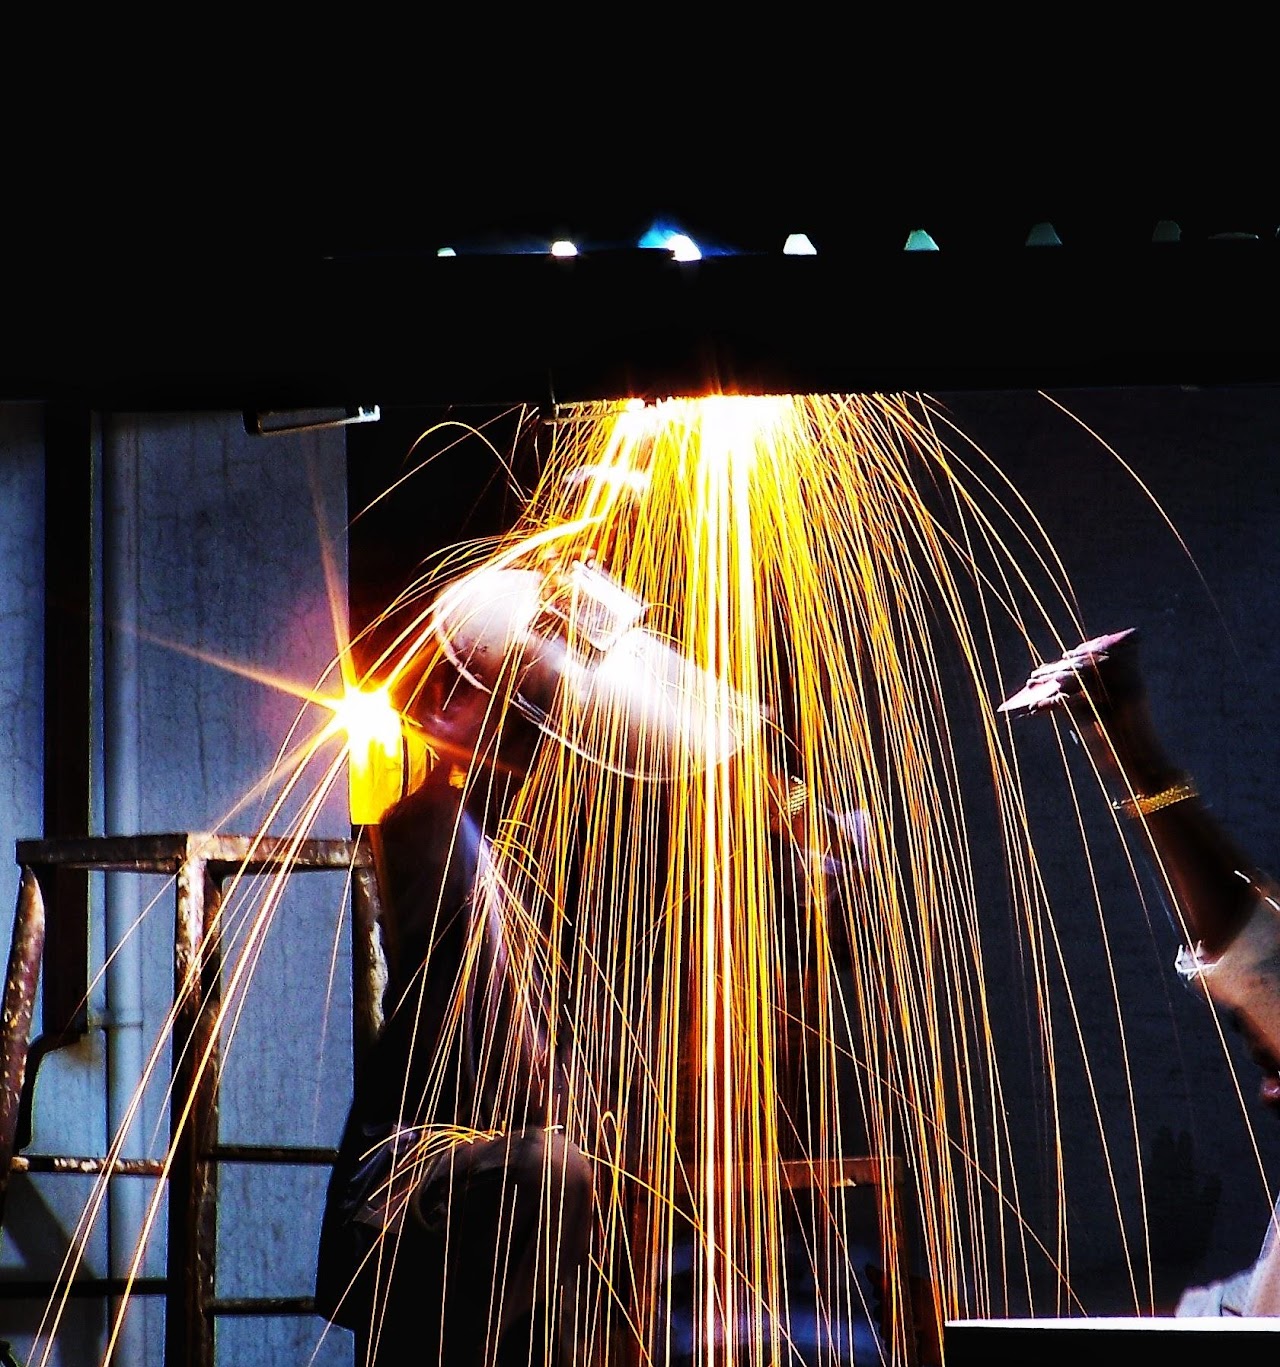
Here is a picture of a man welding, shot with an exposure of 5s shows trails of hot molten metal falling off of the weld. We can also see the movement of the arm on the right side of the image.
ISO

Finally we come to the ISO of a sensor. ISO stands for International Organisation of Standards, which basically means nothing without a backstory. Back in the days of film photography, the sensitivity of the film (the amount of silver salts present in the sheet of film) would act as a third way of increasing or decreasing the amount of “light” in a photo. The term light is used handwavily here as no extra light is falling on the film itself, rather a higher ISO film is just more sensitive to the already present light, in other words, this is “artificial light”.
With higher ISOs, there comes a trade off in the image quality. A higher ISO requires more silver salts in the film roll which creates a “grain” that can be seen in the final result. This grain is seen as small dots (kind of like pepper flakes) all over the image. We can see such a result in the above image, especially along the right side.
In digital photography, the ISO represents the sensitivity of the sensor itself to light. This sensitivity is changed electronically through amplifiers, i.e. the voltage itself is amplified to give the perception of more light. All this amplification leads to what we call “noise” for a digital camera. This noise is basically pixels that are either too sensitive to the light or not sensitive enough, and is mainly caused because of very minute imperfections in the manufacturing process.
How to choose the correct ISO?
When it comes to ISO, there isnt really an artistic reason to choose ISOs like there was with shutter speed or aperture. Once a photographer is satisfied with their choice of shutter speed and aperture, they then move onto the ISO and adjust it till they are happy with their exposure. Usually we try and stay at the lowest possible ISO that gives a perfectly exposed image so as to reduce noise. However, grain can be added back into the photo during post processing (editing) to achieve a filmic look which is quite a popular look and feel nowadays.